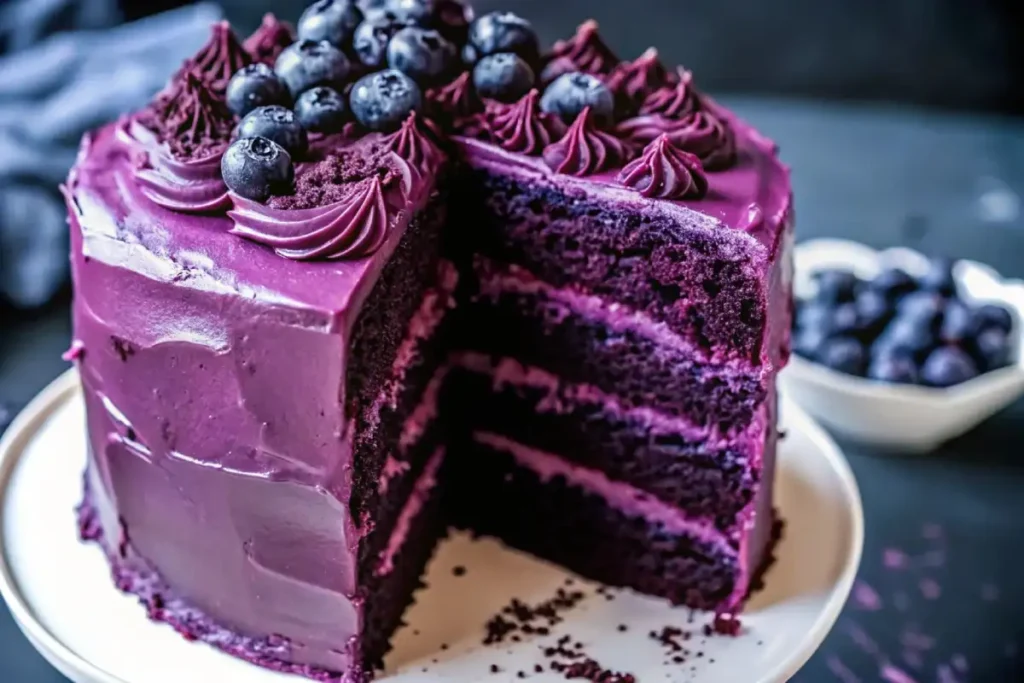
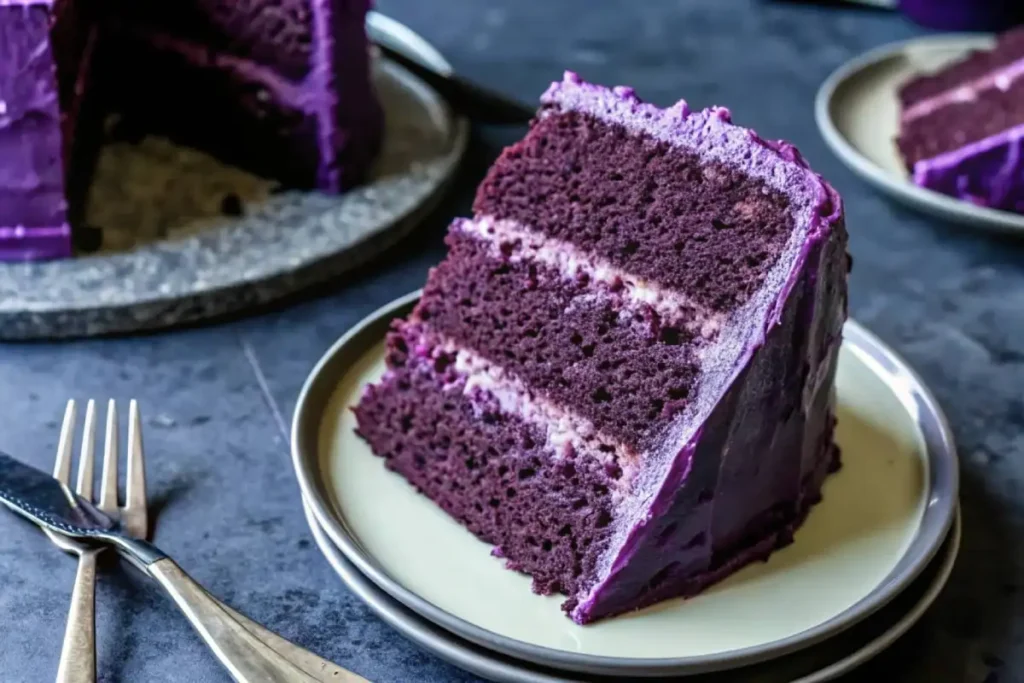
Have you ever dreamed of baking something straight out of a fairytale? The purple velvet cake is exactly that – a cake so unique and beautiful, that it looks like it belongs in a magical storybook. Imagine slicing into moist violet layers, topped with the creamiest white chocolate frosting. It’s a dessert that doesn’t just taste amazing but turns heads too!
In this guide, I’ll walk you step-by-step through an easy velvet cake recipe that anyone can master, even if you’re not a seasoned baker. By the end of this, you’ll have a cake that’s not only a treat for your taste buds but also Instagram-worthy. Let’s get started!
Table of Contents
My Magical Purple Velvet Creation
Let me tell you, the first time I made this cake, I was blown away. I wanted something that wasn’t just another red velvet cake but had the same charm with a playful twist. So, I took the essence of the classic, added some creativity, and voila – this purple masterpiece was born. Now, it’s my go-to for celebrations, and trust me, it never fails to impress.
There’s something about the color purple that’s so whimsical and inviting. It’s bold yet elegant, making it perfect for birthdays, weddings, and even quiet moments when you just want to treat yourself. Pair it with creamy, dreamy white chocolate frosting, and you’ve got magic on a plate.
Why You Need This Recipe
Life’s too short for boring desserts, right? This purple velvet cake recipe isn’t just unique; it’s an unforgettable experience. Its moist, tender crumb and stunning violet layers make it perfect for special occasions. Want to elevate your next gathering? Pair this cake with other creative options and explore the best cake flavor combinations for every occasion.
What’s even better is how easy it is to make. Whether you’re a beginner or a pro, this recipe is straightforward and fun. And let’s not forget the reactions – cutting into vibrant violet layers feels like a little surprise every time. So, if you’re looking to make your next event memorable, this is the cake to do it.
Gathering Your Ingredients
Before we dive into baking, let’s make sure you have everything you need. One of the best parts about this recipe is that it uses simple, pantry-friendly ingredients with just a few special touches. Here’s what you’ll need:
For the Cake
- All-purpose flour: 2 ½ cups – this forms the base of your cake.
- Granulated sugar: 1 ½ cups – for sweetness, of course.
- Baking soda: 1 teaspoon – helps the cake rise perfectly.
- Salt: 1 teaspoon – balances out the sweetness.
- Cocoa powder: 1 teaspoon – gives the cake a subtle chocolatey undertone.
- Vegetable oil: 1 ½ cups – keeps the cake moist and tender.
- Buttermilk: 1 cup, at room temperature – adds tanginess and a soft texture.
- Eggs: 2 large, at room temperature – they bind the batter together.
- Red food coloring: 2 tablespoons – a key ingredient for that vibrant hue.
- Purple food coloring: 1 teaspoon (or more) – adjust for your perfect shade.
- White vinegar: 1 teaspoon – enhances the texture by activating the baking soda.
- Vanilla extract: 1 teaspoon – for a little extra depth of flavor.
For the White Chocolate Frosting
- Cream cheese: 1 pound, softened – creates that creamy, tangy base.
- Unsalted butter: 2 sticks, at room temperature – adds richness.
- Confectioners’ sugar: 4 cups, sifted – sweetens and thickens the frosting.
- White chocolate: 6 ounces, melted and cooled – gives the frosting its signature flavor.
- Vanilla extract: 1 teaspoon – because vanilla makes everything better.
Let’s Bake Together
Getting Started
First things first, preheat your oven to 350°F (175°C). Grease and flour two 9-inch cake pans or line them with parchment paper. This ensures that your cakes come out easily after baking.
The Dry Team
Sift the flour, sugar, baking soda, salt, and cocoa powder in a large bowl. Sifting may seem unnecessary, but trust me, it’s the secret to achieving that smooth, velvety texture. Once sifted, set it aside and get ready for the fun part.
The Wet Squad
Now it’s time to bring your batter to life. Whisk together the vegetable oil, buttermilk, eggs, food coloring, vinegar, and vanilla extract in another bowl. Watch as the colors swirl and blend – it’s like a mini science experiment!
Bringing It All Together
Slowly add the dry ingredients to the wet mixture, mixing just until everything is combined. Be careful not to overmix, as this can make your cake dense instead of light and fluffy. The batter should be a gorgeous shade of purple – feel free to adjust the food coloring until you’re happy with it.
Into the Oven
Divide the batter evenly between the prepared pans and bake for 25–30 minutes or until a toothpick inserted into the center comes out clean. While your cakes bake, your kitchen will fill with the most delightful aroma – a mix of vanilla, cocoa, and magic. Let the cakes cool in the pans for 10 minutes before transferring them to a wire rack to cool completely.
Frosting Magic
Now that your beautiful purple velvet cake layers are cooling, it’s time to talk about the creamy, dreamy white chocolate frosting. If you’ve ever had cream cheese frosting, imagine taking it to the next level with the rich sweetness of white chocolate. This frosting is the perfect partner to your violet layers – smooth, luxurious, and downright irresistible.
But here’s the thing: frosting is an art. It’s not just about slapping it on and hoping for the best. The secret to silky-smooth, spreadable frosting lies in patience and preparation. Don’t worry – I’ve got you covered with some white chocolate frosting tips to make sure it turns out perfectly every time.
Creating the perfect frosting takes patience. To avoid common mistakes that could ruin the texture, check out these tips on how to avoid common baking mistakes for perfect results. With these tips, you’ll whip up creamy, dreamy white chocolate frosting every time.
White Chocolate Frosting Recipe
Let’s start by gathering your frosting ingredients (you’ve got this list from earlier). Now, follow these steps to whip up the creamiest frosting ever:
- Melt the white chocolate: Chop your white chocolate into small pieces and melt it gently in the microwave or over a double boiler. Stir frequently to avoid scorching, and once melted, let it cool slightly. This step ensures your frosting stays smooth and creamy.
- Beat the cream cheese and butter: In a large mixing bowl, use an electric mixer to beat the softened cream cheese and butter until they’re light, fluffy, and fully combined. This step creates the perfect base for your frosting.
- Add the white chocolate: Gradually pour in the melted white chocolate while mixing on low speed. Make sure the chocolate has cooled enough to prevent it from melting the other ingredients.
- Sweeten and flavor: Slowly add the sifted confectioners’ sugar, one cup at a time, mixing until the frosting is smooth and thick. Finally, add the vanilla extract for an extra touch of flavor.
Pro Tip: If your frosting feels too thick, add a splash of milk to loosen it up. If it’s too thin, sift in a little more confectioners’ sugar until you reach your desired consistency.

Assembling Your Purple Velvet Cake
Here’s where the fun begins – bringing your cake to life! Assembly might seem a little intimidating, but with a few tips and tricks, you’ll have a professional-looking masterpiece in no time.
Step 1: Level Your Cake Layers
Once your cake layers are completely cool (and I mean completely – no shortcuts here!), use a serrated knife to trim the tops if they’ve domed during baking. This step ensures your layers stack evenly and gives your cake that clean, polished look.
Step 2: Frost the Layers
Place the first cake layer on your serving plate or cake stand. Spread a generous dollop of frosting over the top and use an offset spatula to spread it evenly, all the way to the edges. Repeat with the second layer, making sure the frosting is smooth and level.
Step 3: Crumb Coat
Ever wondered how bakers get that flawless finish? The secret is the crumb coat. Spread a thin layer of frosting over the entire cake, sealing in any crumbs. It doesn’t have to look perfect – this layer is just the base. Chill the cake in the fridge for 20–30 minutes to set the crumb coat before moving on.
Step 4: Final Frosting
Now comes the satisfying part – covering your cake with a thick, dreamy layer of frosting. Use your spatula to spread the frosting evenly over the top and sides, smoothing it out as much as possible. Don’t stress about perfection – the charm of homemade cakes lies in their character!
Dressing It Up
Want to make your cake a showstopper? With some imagination, this purple velvet cake can look like it belongs in a bakery window. Need ideas? Get inspired by creative cake designs that add elegance to your desserts.
Here are some decoration ideas to make your cake a showstopper:
1. Fresh Fruit
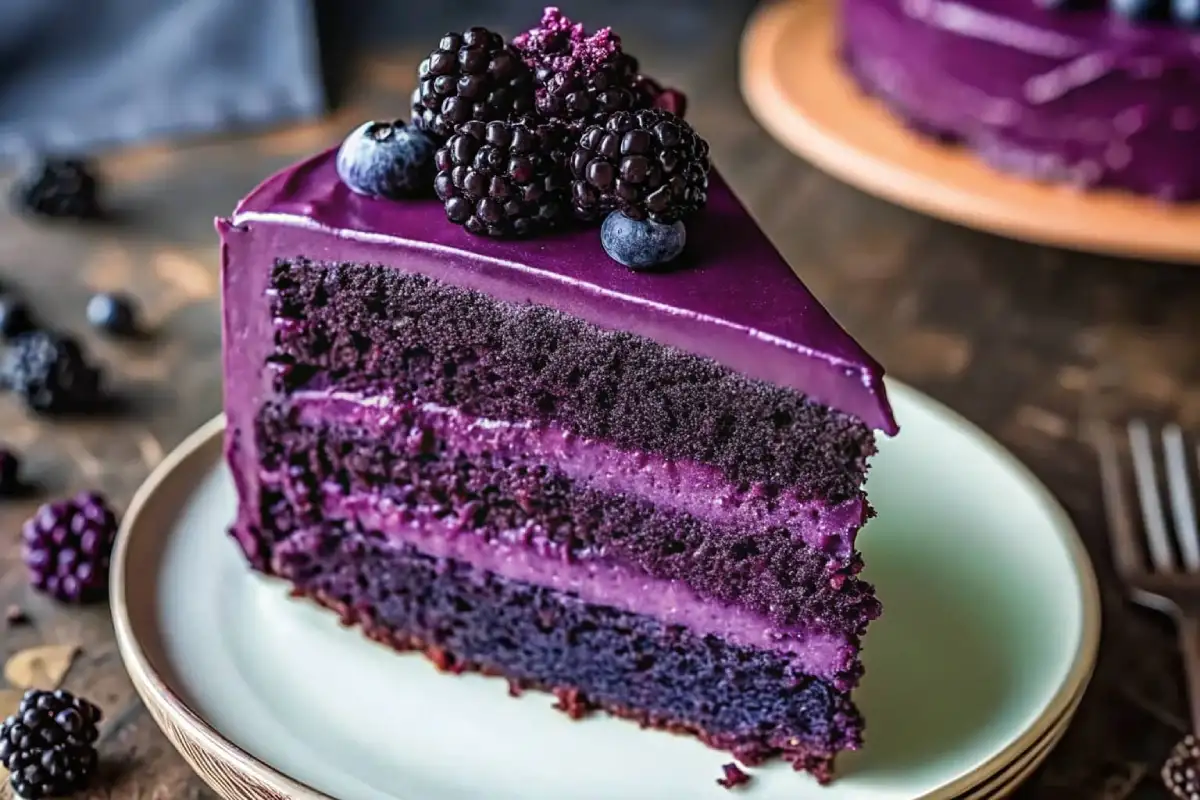
Top your cake with fresh berries like blackberries, blueberries, or raspberries. Their rich colors complement the purple layers beautifully and add a burst of natural sweetness.
2. Edible Flowers
Want to give your cake a fairytale vibe? Decorate it with edible flowers like pansies, lavender, or violets. They’re perfect for weddings, garden parties, or any whimsical occasion.
3. Drizzle It
Add a drizzle of melted white chocolate or purple-tinted ganache over the top for an elegant, dramatic effect. Watching the chocolate drip down the sides is so satisfying, and it makes your cake look like something out of a bakery window.
4. Sprinkle Magic
Who doesn’t love a little sparkle? Use edible glitter or sprinkles to add some fun and flair. Whether it’s for a kid’s birthday party or a grown-up celebration, a little glitter goes a long way.
Serving in Style
After all the hard work you’ve put into your violet velvet cake, it’s only fair to give it the grand presentation it deserves. Here are some tips to serve it like a pro:
- Use a pretty plate: A cake this beautiful deserves a cake stand or a decorative plate that complements its colors.
- Add a finishing touch: A swirl of whipped cream or a few extra berries on the plate can make individual slices look even more inviting.
- Pair it perfectly: Serve your cake with a cup of coffee, a glass of milk, or even a sweet dessert wine for a truly indulgent experience.
Trust me – the moment you cut into this cake and reveal those vibrant purple layers, it’ll be a hit. And the best part? Watch your guests’ faces light up as they take their first bite!

Keeping It Fresh
After all the love and effort you’ve put into baking and decorating your purple velvet cake, you’ll want to make sure it stays fresh for as long as possible. Whether you’re saving leftovers (if there are any!) or prepping the cake ahead of time, here’s how to keep your masterpiece moist and delicious.
Short-Term Storage
If you plan to serve the cake within a day or two, store it in an airtight container at room temperature. The frosting acts as a natural seal to keep the cake moist, but make sure the container is snug – no one likes a dry cake! If your kitchen is warm, pop it in the fridge to prevent the frosting from melting.
Long-Term Storage
Need to save your cake for later? No problem! Wrap individual slices tightly in plastic wrap and place them in an airtight container before freezing. This way, you can enjoy a slice of purple magic whenever the craving strikes. Your cake will stay fresh in the freezer for up to three months. When you’re ready to indulge, let it thaw at room temperature for an hour or two.
Make It Your Own
One of the best things about this violet velvet cake recipe is how versatile it is. You can tweak it to fit your preferences, the season, or the occasion. Here are some fun ideas to help you put your spin on it:
1. Add a Hint of Citrus
For a refreshing twist, add the zest of an orange or lemon to the cake batter. The citrus flavor pairs beautifully with the slight tang of the frosting, giving your cake a bright, summery vibe.
2. Go Nutty
Love a little crunch? Sprinkle chopped pecans or walnuts between the layers or on the frosting. The nutty flavor adds a lovely contrast to the cake’s sweetness.
3. Play with Colors
While purple is undeniably magical, you can experiment with other shades to match your theme. The possibilities are endless: a pastel pink cake for a baby shower or a rich teal for a peacock-themed event!
4. Flavor the Frosting
Take your frosting to the next level by adding a splash of almond or coconut extract. You could also stir in a handful of shredded coconut or a drizzle of caramel for extra indulgence.
5. Add Fruit Layers
Want to make your cake even more decadent? Add a layer of fresh berries or berry compote between the cake layers. Not only does it enhance the flavor, but it also adds a stunning visual element when you slice into it.
Seasonal and Themed Variations
Feeling whimsical? This cake works beautifully with seasonal themes. If you love bold colors and fun desserts, you should try another whimsical dessert like cotton candy cake. It’s all about having fun with your bakes!
Here are some ways to adapt your easy velvet cake recipe to fit the vibe:
Spring: Floral Elegance
Celebrate spring by decorating your cake with edible flowers like violets or pansies. A sprinkle of powdered sugar on top adds a touch of “springtime snow.”
Summer: Berry Bliss
Top your cake with a crown of fresh summer berries – think blueberries, raspberries, and blackberries. Serve it chilled for a refreshing treat on a hot day.
Autumn: Cozy Comfort
For fall, add a pinch of cinnamon or nutmeg to the batter for warm, spiced notes. Decorate with candied pecans or a drizzle of caramel sauce for the ultimate cozy dessert.
Winter: Frosted Fantasy
Turn your purple velvet cake into a winter wonderland with white chocolate shavings, a dusting of powdered sugar, and maybe a few edible silver stars. It’s perfect for holiday gatherings!
Share the Joy
This cake isn’t just about indulging yourself – it’s a chance to spread a little happiness. Whether you’re baking it for a loved one’s birthday, bringing it to a party, or surprising a friend just because this cake has a way of making people smile.
Gifting Tip
Why not bake mini purple velvet cakes in small pans or cupcake tins? Wrap them in decorative boxes or clear cellophane with a pretty ribbon. They make adorable party favors or heartfelt gifts that people will talk about long after the last bite.
Sweet Memories
Some of my favorite baking memories involve making this purple velvet cake. Whether it’s teaching my little niece how to frost or watching my friends’ faces light up when they cut into the colorful layers, this cake is more than just dessert – it’s a way to create moments that matter.
And now, it’s your turn! I hope this recipe becomes a part of your special occasions, whether you’re celebrating big milestones or simply making an ordinary day a little sweeter.
Conclusion: Pure Magic on a Plate
The purple velvet cake is more than a dessert – it’s a conversation starter, a memory maker, and a masterpiece in its own right. From its stunning violet layers to the creamy white chocolate frosting, this cake is guaranteed to impress. Whether you’re baking it for a birthday, wedding, or just because, you can’t go wrong with this whimsical creation.
So, what are you waiting for? Gather your ingredients, preheat that oven, and let’s bake some magic. Don’t forget to share your creations – I’d love to see how your cake turns out!
Frequently Asked Questions (FAQs)
What flavor is purple velvet cake?
Purple velvet cake has a subtle chocolate flavor with a slightly tangy undertone, thanks to the addition of buttermilk and vinegar. The cocoa powder gives it a mild chocolate base, while the other ingredients create its signature moist and velvety texture. It’s similar to red velvet but with a whimsical twist!
What’s the difference between red velvet and purple velvet?
The primary difference between red velvet and purple velvet cakes lies in their color. While red velvet uses red food coloring for its vibrant hue, purple velvet combines red and purple food coloring to achieve a unique, violet shade. Flavor-wise, they are very similar, as both share the same ingredients and preparation method.
How to turn red velvet purple?
Turning red velvet purple is easy! Simply adjust the food coloring in your recipe. Start with red food coloring, then gradually add purple food coloring until you achieve the desired shade of violet. Using gel food coloring is recommended, as it’s more concentrated and won’t thin out your batter.
What’s the difference between a velvet cake and a regular cake?
The key difference between a velvet cake and a regular cake is texture. Velvet cakes are known for their soft, smooth, and tender crumbs, achieved by using buttermilk and vinegar. These ingredients create a chemical reaction with baking soda, giving the cake its moist and fluffy consistency. Regular cakes don’t typically include these components and may have a denser texture.
Print
Purple Velvet Cake Recipe
- Total Time: 50 minutes
- Yield: 12 servings (2-layer cake)
- Diet: Vegetarian
Description
A whimsical twist on the classic red velvet, this purple velvet cake is moist, tender, and topped with creamy white chocolate frosting. Perfect for celebrations, this recipe is easy to follow and guarantees stunning results!
Ingredients
For the Cake:
- 2 ½ cups all-purpose flour
- 1 ½ cups granulated sugar
- 1 teaspoon baking soda
- 1 teaspoon salt
- 1 teaspoon cocoa powder
- 1 ½ cups vegetable oil
- 1 cup buttermilk, at room temperature
- 2 large eggs, at room temperature
- 2 tablespoons red food coloring
- 1 teaspoon purple food coloring (add more for a deeper hue)
- 1 teaspoon white vinegar
- 1 teaspoon vanilla extract
For the White Chocolate Frosting:
- 1 pound (16 oz) cream cheese, softened
- 1 cup (2 sticks) unsalted butter, softened
- 4 cups confectioners’ sugar, sifted
- 6 ounces white chocolate, melted and cooled
- 1 teaspoon vanilla extract
Instructions
For the Cake:
- Preheat the oven: Set your oven to 350°F (175°C). Grease and flour two 9-inch round cake pans or line them with parchment paper.
- Mix the dry ingredients: In a large bowl, sift together the flour, sugar, baking soda, salt, and cocoa powder. Set aside
- Combine the wet ingredients: In another bowl, whisk together the vegetable oil, buttermilk, eggs, food colorings, vinegar, and vanilla extract until smooth and well combined.
- Combine wet and dry: Gradually add the dry ingredients to the wet ingredients, mixing gently until just combined. Be careful not to overmix!
- Divide and bake: Pour the batter evenly into the prepared pans. Bake for 25–30 minutes, or until a toothpick inserted into the center comes out clean.
- Cool the cakes: Let the cakes cool in their pans for 10 minutes, then transfer them to a wire rack to cool completely before frosting.
For the Frosting:
- Melt the white chocolate: Gently melt the white chocolate in the microwave or over a double boiler. Let it cool slightly.
- Beat the cream cheese and butter: In a large bowl, use an electric mixer to beat the softened cream cheese and butter until light and fluffy.
- Add the white chocolate: Gradually mix in the cooled melted white chocolate until fully incorporated.
- Sift and mix: Add the confectioners’ sugar one cup at a time, mixing until smooth. Finally, add the vanilla extract and mix again until fluffy.
Assembling the Cake:
- Level the layers: If the cakes have domed tops, level them with a serrated knife for even stacking.
- Layer and frost: Place one cake layer on a serving plate, spread a generous amount of frosting on top, and smooth it out. Add the second layer and frost the entire cake, smoothing the sides and top.
- Decorate: Add your choice of toppings, like fresh berries, edible flowers, or a drizzle of white chocolate.
Notes
- Adjust the amount of purple food coloring to achieve your desired shade.
- For extra moisture, brush the cake layers with a simple syrup before frosting.
- Store leftovers in an airtight container in the refrigerator for up to 5 days.
- Prep Time: 20 minutes
- Cook Time: 30 minutes
- Category: Dessert
- Method: Baking
- Cuisine: American
